Recipe – Bone Marrow Panna Cotta

Introduction

This is a quick recipe that would be perfect as a Christmas or birthday dessert. Start to finish it takes about 45 minutes or so, with a third of that time for roasting the marrow bones.

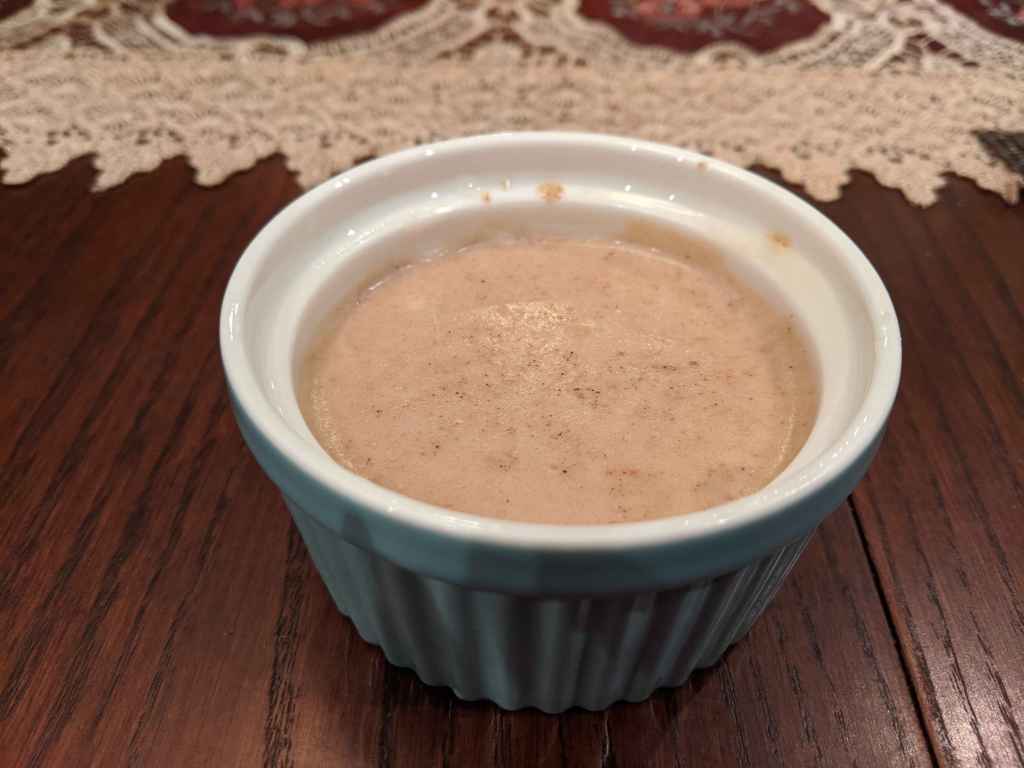
Finished Panna Cotta in a ramekin

It is easily modifiable to create something that suits your diet. A more savory version could be created by nixing the spices and sweetener, a non-dairy version could be created for omnivores by swapping heavy cream for coconut cream, spices could be changed to suit your preference – go hog wild! I take recipes as suggestions, not hard and fast guidelines. Just be aware if you change the recipe and dislike it – I’m not responsible!

One small note I’d add is not to use granulated erythritol, as it tends to re-crystalize after cooling. Sweetener amounts will vary depending on what you’re using.

Materials

3 Marrow Bones, raw

1 tsp ground cinnamon

1 tsp cardamom

2 pinches of saffron

1 cup of heavy cream

1/4 tsp vanilla extract

1.5 tbsp confectioner’s swerve (depending on preference)

(Optional) 28g cocoa butter

1 tsp gelatin

Methods

  1. Preheat oven to 450 F (230 C)
  2. Roast marrow bones on a baking sheet for 15-20 minutes once oven is to temperature
  3. Remove marrow bones from oven and place a wire rack on the baking sheet with the marrow bones on top while they cool.
    • This allows the fat to collect in the pan for later use.
  4. Once the marrow bones are cool, empty the marrow into a separate bowl using a chopstick or similar to swirl around the inside of the bone to easily remove the marrow, or use your preferred method.
    • 3 marrow bones gave me about 2.2 ounces of marrow and residual fat
  5. Pour the fat (about a tablespoon) from the baking sheet into a medium sized saucepan on low heat, coating the entirety of the bottom of the pan
  6. Add your spices to the marrow fat and roast on low heat (being careful not to burn them!) until fragrant
  7. Add heavy cream and stir until spices are thoroughly incorporated (be careful not to scorch or boil the cream – be sure to stir constantly)
  8. Add vanilla extract and confectioners swerve
  9. (Optional) Add cocoa butter, stirring until melted
  10. Pour cream into bowl with bone marrow and use immersion blender until completely smooth, being careful not to whip the cream (a food processor or blender can also be used)
  11. Pour cream mixture through a fine mesh strainer, back into the saucepan, to ensure there are no lumps
  12. Add gelatin, gently whisking on low heat to incorporate into cream mixture for 1-2 minutes
  13. Pour cream mixture evenly into three ramekins or molds
  14. Refrigerate until completely set (usually 4 hours or overnight)
  15. Eat!

Results

The bone marrow panna cotta does not have a strong marrow taste. With cocoa butter the taste is very chocolate-y, and without cocoa butter it is more of a cinnamon swirl flavor. The texture is creamy, and it is very rich. It is loaded with animal fats (plus cocoa butter if you opt for it), particularly saturated fat, so it makes a nice, small, dessert.

I don’t particular like to cook unless I have company, so this is something I’d keep to holidays and special occasions. But if you have marrow bones laying around and you need something to do with them besides eating them roasted, or in bone broth, perhaps this is something you could give a try.

Background

One day on twitter there was a little happy accident. This happy accident was seeing the below image while browsing through Twitter and misreading the slogan as “When the desire for marrow-based confection prevails[…]”

Misreading “mallow” as “marrow” started it all

Upon re-reading and realized I’d misread a rather crucial word, I then gave a little thought to the concept of a marrow-based confection. Could such a thing be possible? Should such a thing be possible? After a while I decided bone marrow panna cotta may be the perfect way to achieve such a thing. After looking up various panna cotta recipes to get a feel for what they generally consist of, and a couple of test runs, the above recipe came to be.

If you decide to try out (or modify) this recipe, let me know how it turns out! Have suggestions for improvement? Know of a way to make, e.g., a dairy free carnivore version? Put your own spin on the recipe? Let me know below!

Citations

Carolyn. “White Chocolate Panna Cotta – Keto Recipe.” All Day I Dream About Food, 15 Feb. 2020, alldayidreamaboutfood.com/keto-panna-cotta/. (archive)

LC Editors. “Roasted Bone Marrow.” Leite’s Culinaria, 6 Feb. 2020, leitesculinaria.com/78928/recipes-roasted-bone-marrow.html. (archive)

Recipe – Christmas Pickled Pork Fat Brine

Since I started high fat carnivore, the search for fat sources I enjoy consistently and in large amounts has not been an easy one. I don’t particularly like cooked fat (such as on steaks) due to the texture, rendered/liquid fats don’t often sit well with me, and dairy can be problematic when it comes to weight loss.

Raw fat has been the closest to ideal I could find, but the texture isn’t always quite right (sometimes not firm enough for me to enjoy eating).

Luckily, my current housemate Amber got the idea to make pickled pork fat from Umbrellix on twitter, and when I tried it I was pleasantly surprised. Originally, Amber was making the pickled pork fat with leftover brine from store bought pickles. But, after my sister scolded me for not making my own, I decided to give it a go.

Instead of a traditional pickle brine, I went for something more on the “sweet” side, instead of sour, although there’s no sweetener. This is accomplished by using apple cider vinegar, and more “sweet” spices. I feel this compliments the richness of the fat, and the taste is something I can enjoy every day, as opposed to traditional pickle brine that I tend to get sick of after a few days.

I eat the finished product right out of the jar, or in a large bowl, plain.

Note, that because this doesn’t involve any processing (e.g. a hot water bath, and salt in the brine) it probably doesn’t preserve the fat – however one jar usually lasts about a week if I’m eating it alone, so it isn’t an issue for me. Make a smaller batch, and freeze off the rest of the raw pork fat if you’re not sure how much you’ll eat.

Also eating raw anything, even if pickled, comes with risks. Use your best judgement.

Pickled pork fat in the jar and on the plate! With some beef roast.

Ingredients

  • 1/2 cup apple cider vinegar
  • 1/2 cup water
  • 1 tsp whole cloves
  • 1 tsp whole liquorice root
  • 1 tsp dried ginger chunks

Combine all ingredients in a large, clean glass jar or other container. Add your raw pork fat, chopped up into small cubes, separating the pieces if they’re stuck together so the brine comes into full contact with all the fat. If you’ve filled the jar and some of the fat isn’t covered by brine, add additional vinegar/water in equal portions until covered or split into two containers.

Seal, and let set for two or three days, and enjoy.

You could also add other christmas-y spices like cinnamon (I might do that myself next time) or whatever else you enjoy. Either way, I quite like the end result, and am quite glad to have another source of yummy fat in my diet with minimal effort.

Recipe – Satiety Soup

Don’t worry – I don’t intend to wax poetic about the first day I ever heard of a chicken and how that leads into how I began to ponder over the meaning of life as I prepared this recipe for the first time on a cold winter morning (as is the stereotypical recipe page on a blog). I merely wanted to place this recipe where it was easy to find so I could – honestly – be lazy about it when asked on Twitter. It’s pretty simple, although as a warning if you are fat averse you may be offended by the recipe, and if you fear saturated fat it may result in nightmares. Enjoy.

Without Further Ado…

Ingredients

16oz of cream cheese (softened)

16oz of creme fraiche

Shredded Gouda cheese for topping

~5 lbs of chicken tenderloin (chicken breast sliced into strips)

Preparation

Preheat the oven to 325 F.

Mix the cream cheese and creme fraiche in a bowl – heating if necessary – and set aside.

Line a large baking dish (e.g. 13 x 9 in) with the chicken tenderloin, packing tightly. Cover with half of the prepared sauce and smooth until uniformly covered.

Add the rest of the chicken, and the rest of the sauce, and a generous covering of shredded gouda (or cheese of your preference) and cook in oven for about an hour or until the cheese is caramelized and the chicken is cooked through.

Suggested Tweaks

  1. If you’d prefer a true soup, try pre-cooking the chicken and cutting into cubes, and mix all of the sauce ingredients (including shredded cheese) in a pot along with chicken broth. Once it is heated, add the chicken.
  2. If you can tolerate spices garlic powder, onion powder, black pepper, thyme, and/or poultry seasoning would all be welcome additions.
  3. If low carb/keto and not carnivorous use as a base for chicken pot pie with fathead crust. Thicken with xantham gum if needed, and add spices and cooked onions/carrots as desired.

Feel free to suggest further keto/carnivore friendly tweaks below if you so wish, and if you do make it (even as simple as it is) let me know if you enjoyed. I’m not much of a cook, barring meats and dipping sauces for said meat, but I’m pretty pleased with how this one turned out.